lunedì 27 febbraio 2017

How to correct liquid sourdough strenght

Mature liquid sourdough
Hello folks ! Have been a while since I did not post here, but the book, the baking itself and sport duties don't conceed me a lot of spare time...
I had the idea to write this piece while I was looking some feeds on Instagram and I figure that some people (either pro and home bakers) had the same problem with liquid sourdough.
The main issue was a lack of activity (or strenght) and a strange smell/flavor that was not typically related to sourdough. Since the acidity was good, (let's say around 3,8 to 4,2 ph), as well as proofing times and temps, the problem was obviously generated from some bacterias contamination. It's not quite easy for sourdough to be contaminated, but in some cases, even if one works with the right hygiene protocol it happens. If the levain have been suffering some stress, in example very long fermentations with either low starter inoculation and/or low temperatures (like in winter), the natural barriers from external bacterias may not work. Infact just the use of an organic flour which brings some different bacterias strains than usual can give problems of this kind.
What to do if refreshing after refreshing the issue does not solve?
The most secure (and drasthic) option is to toss the sour and make a new one from zero....
Obviously no one want to loose their beloved levain :)
Here is a method to try (with success most of the times) to bring back in strenght our sourdough.
First, we need to refresh it one time with this formula: 1:4:2 (starter:strong flour:water), mix it until a developed dough is formed (dough temp 25c) and let ferment 8 hours at 26-28c covered.
With a knife, cut the peel off and take only the heart of our stiff starter. Cut the center in 1cm slices and put them into a solution of 28c water with 0,1% white sugar for 15 minutes. (Water should be 5 parts greater than sourdough weight and 0,1% white sugar calculated on water weight). Be careful to not dissolve the slices in the water by using a gentle touch. Repeat the process, (refreshment and bath), until you loose the off flavor and solve the issue.
After that, the stiff starter can be converted again in liquid sourdough by proceeding with a couple (or three) feedings in which you augment the water %.
NB. this process can be used also for too acidic sourdoughs but not for yeasty ones.
Hope this will serve and I wish you many great "Natural Leavenings"

Ps. I found a transaltor for the book so it will be released quite soon in English ! :D


giovedì 9 febbraio 2017

Wallpaper

Ciao cari bakers ! Per celebrare un anno di Instagram e la fine della stesura del libro "Lievitazioni Naturali" che raccoglie un po le migliori panificazioni, eccovi un piccolo regalo che spero sia gradito :)
Il wallpaper di uno dei miei pani preferiti: Il pane di Campagna scuro
Il link per il download lo trovate in fondo. Ciao e buone panificazioni !

Hello dear bakers ! To celebrate one year of Instagram and the finishing of the book "Natural Leavenings" which resume the best recipes, here it is a little present that I hope will be  appreciated :)
A wallpaper of one of my favorite breads: The Country brown bread
Download link is at the end. Bye and good bakings !


https://we.tl/VZDFMY23eq

giovedì 19 gennaio 2017

Pane di Campagna scuro - primo passo verso l' alta idratazione - Country brown - a first step into high hydration breads


Country Brown


Ciao a tutti ! Dopo le vacanze invernali, eccomi alle prese con un nuovo articolo, questa volta una ricetta di pane, per iniziare l' anno nuovo col piede giusto :)
Come promesso, questa è la ricetta del pane di Campagna scuro del video che ho postato sui social.
Penso sia una ricetta perfetta come inizio per l'alta idratazione perchè oltre ad essere molto gustosa, è di facile esecuzione.
Utilizzando farine integrali si massimizza l' assorbimento dell' acqua, quindi l' impasto risulta essere più facile da manipolare.


                                                                                 ....

Hello everyone ! After the winter seasonal vacation, I am back with a new article, this time a bread recipe, to start "with the right foot" the new year :)
As I promise, this is the recipe of the Country brown sourdough bread featured in the video I did post on socials.
I guess it' s a perfect recipe to start with high hydration because it' s very tasty but also quite easy.
Using whole grains flours maximize water absorbtion, so the dough resulting, is easier to handle.


Ricetta:


Per il pre-fermento:

200 gr di farina tipo 0 forte
100 gr di acqua
50 gr di pasta madre

Rinfrescare la pasta madre con le proporzioni indicate. Lasciare fermentare a 18 c per circa 17-18h

Per l' impasto:

60 gr di segale integrale
100 gr di farro integrale
700 gr di tipo2
210 gr di pasta madre
22 gr di sale rosa fine
780-800 gr di acqua (dipende dall' assorbimento della farina)

Procedimento:

Impastare brevemente tutto assieme tranne il sale.
lasciare riposare 30-40 minuti poi aggiungere il sale e proseguire ad impastare a bassa velocità per 5 - 8 minuti oppure a mano con s&f fino ad ottenere una consistenza morbida.
Mettere a fermentare a 28c per 4-5 ore dando 3/4 giri di pieghe a seconda della forza dell' impasto.
NB. non esagerare a sviluppare forza in questa fase, durante la formatura avremo l' occasione di aumentarla ulteriormente.

Staglio e pre-forma a tondo.
Dopo un riposo di circa 15 minuti, formare ad ovale abbastanza stretto prestando attenzione a non
rovinare la tensione.
Fermentare per 14-18 h  a 6c

Praticare un taglio centrale e cuocere a 240c per 20 min con vapore, finire la cottura a 220 per 40 minuti.


Country Brown slice
                                                                                  ....


Recipe:


Stiff sourdough:

200 gr bread flour
100 gr water
50 gr Stiff sourdough

Refresh with the given quantities, and ferment for 17-18h at 18c

Bread:

60 gr whole rye
100 gr whole Farro
700 gr High extraction wheat
210 gr Sourdough
22 gr Pink salt
780-800 gr water (depending on flour absorbption)

Method:

Mix briefly all the ingredients but the salt. Let rest for 30-40 mins then add the salt and mix at slow speed for 5 to 8 mins or with s&f until you get a soft consistency.
Put it ferment at 28c for 4-5h doing 3/4 folding sets depending on dough strenght.
Don't exagerate at this point to build strenght, during the shaping phase we have time to build more.

Cut and round pre-shape
After 15 mins rest, shape batard quite tight paying attention to not break the tension.
Ferment at 6c for 14-18h

Score and cook at 240c for 20 mins with vapor, then 40 mins at 220.


Ready for the oven and baked


giovedì 22 dicembre 2016

Panettone classico (ricetta per casa - home-baking recipe)

Buonasera a tutti ! Giusto in tempo per le festività natalizie, finalmente riesco a postare la ricetta del Panettone classico fatto in casa :)
Senza troppi preamboli, vi dico subito che questa ricetta è la mia versione ed è stata sviluppata per essere fatta con pochi essenziali strumenti. Basta avere una planetaria basica come Kitchen aid o Kenwood (io ho usato quest' ultima).
Il procedimento è molto più immediato di quelli soliti che girano in rete ma non per questo meno effettivo.. anzi ! Con questo metodo, risparmieremo tempo, avremo una maglia glutinica migliore e non incorreremo nel rischio di surriscaldare il nostro impasto.

                                                                                  ***

Good evening ! Right in time for Christmas's holidays, finally I am able to post the Panettone classico recipe for home bakers :)
Without speaking too much, I tell you that this recipe is my version and has been developed to perform great with few essential instruments. Just a basic planetary mixer like Kitchen aid or Kenwood (I did use this one) will do the job.
The method is simpler than usual ones you can find in internet, but not for this reason less effective...
With this method, we get a faster mixing, with a better gluten development and with no heating of the dough.
To avoid a very big post, I will write the recipe in italian, with just the method translated, I hope you can understand the simpler things :)


Bene, detto questo ecco la ricetta per due panettoni da 1kg circa - Good, that said here is the recipe for two panettoni of 1kg size.


I giorno (Messa in forza della pasta madre) - pasta madre refreshings


Al mattino, rinfreschiamo la nostra pasta madre con la proporzione 1:1 (pasta madre:farina) al 45% di acqua. (Se acida prevedere un bagnetto). Fermentare 3/4 ore a 26c

Ripetere per altre due volte i rinfreschi, ottenendo alla sera il lievito pronto per andare nell' impasto.


                                                                             ***

In the morning, refresh our pasta madre with the proportion 1:1 (pasta madre:flour) at 45% hydration. (if it's acid do the bagnetto). Ferment it 3 to 4 hours at 26°C

Repeat 2 more times, so you get the sourdough ready in the evening for the first dough.


I giorno (Impasto della sera)


500 gr farina 0 bio forte (organic strong white flour)
140 gr tuorlo (yolks)
140 gr zucchero fine (fine sugar)
150 gr burro a temperatura ambiente (morbido)  -  pliable butter
250 gr acqua (water)
135 gr pasta madre


Mettere nell' ordine in macchina:
Acqua, zucchero, tuorlo, pasta madre e farina. Azionare la planetaria per 3 minuti su velocità 2 con la pala montata. Controllare che non ci siano residui di farina sui bordi, poi aumentare la velocità gradualmente ogni minuto fino ad arrivare alla 5. Lasciare lavorare circa 15 minuti o fino a che l' impasto inizia a staccarsi dai lati della vasca. Tornare sulla velocità 2 e aggiungere tutto il burro.
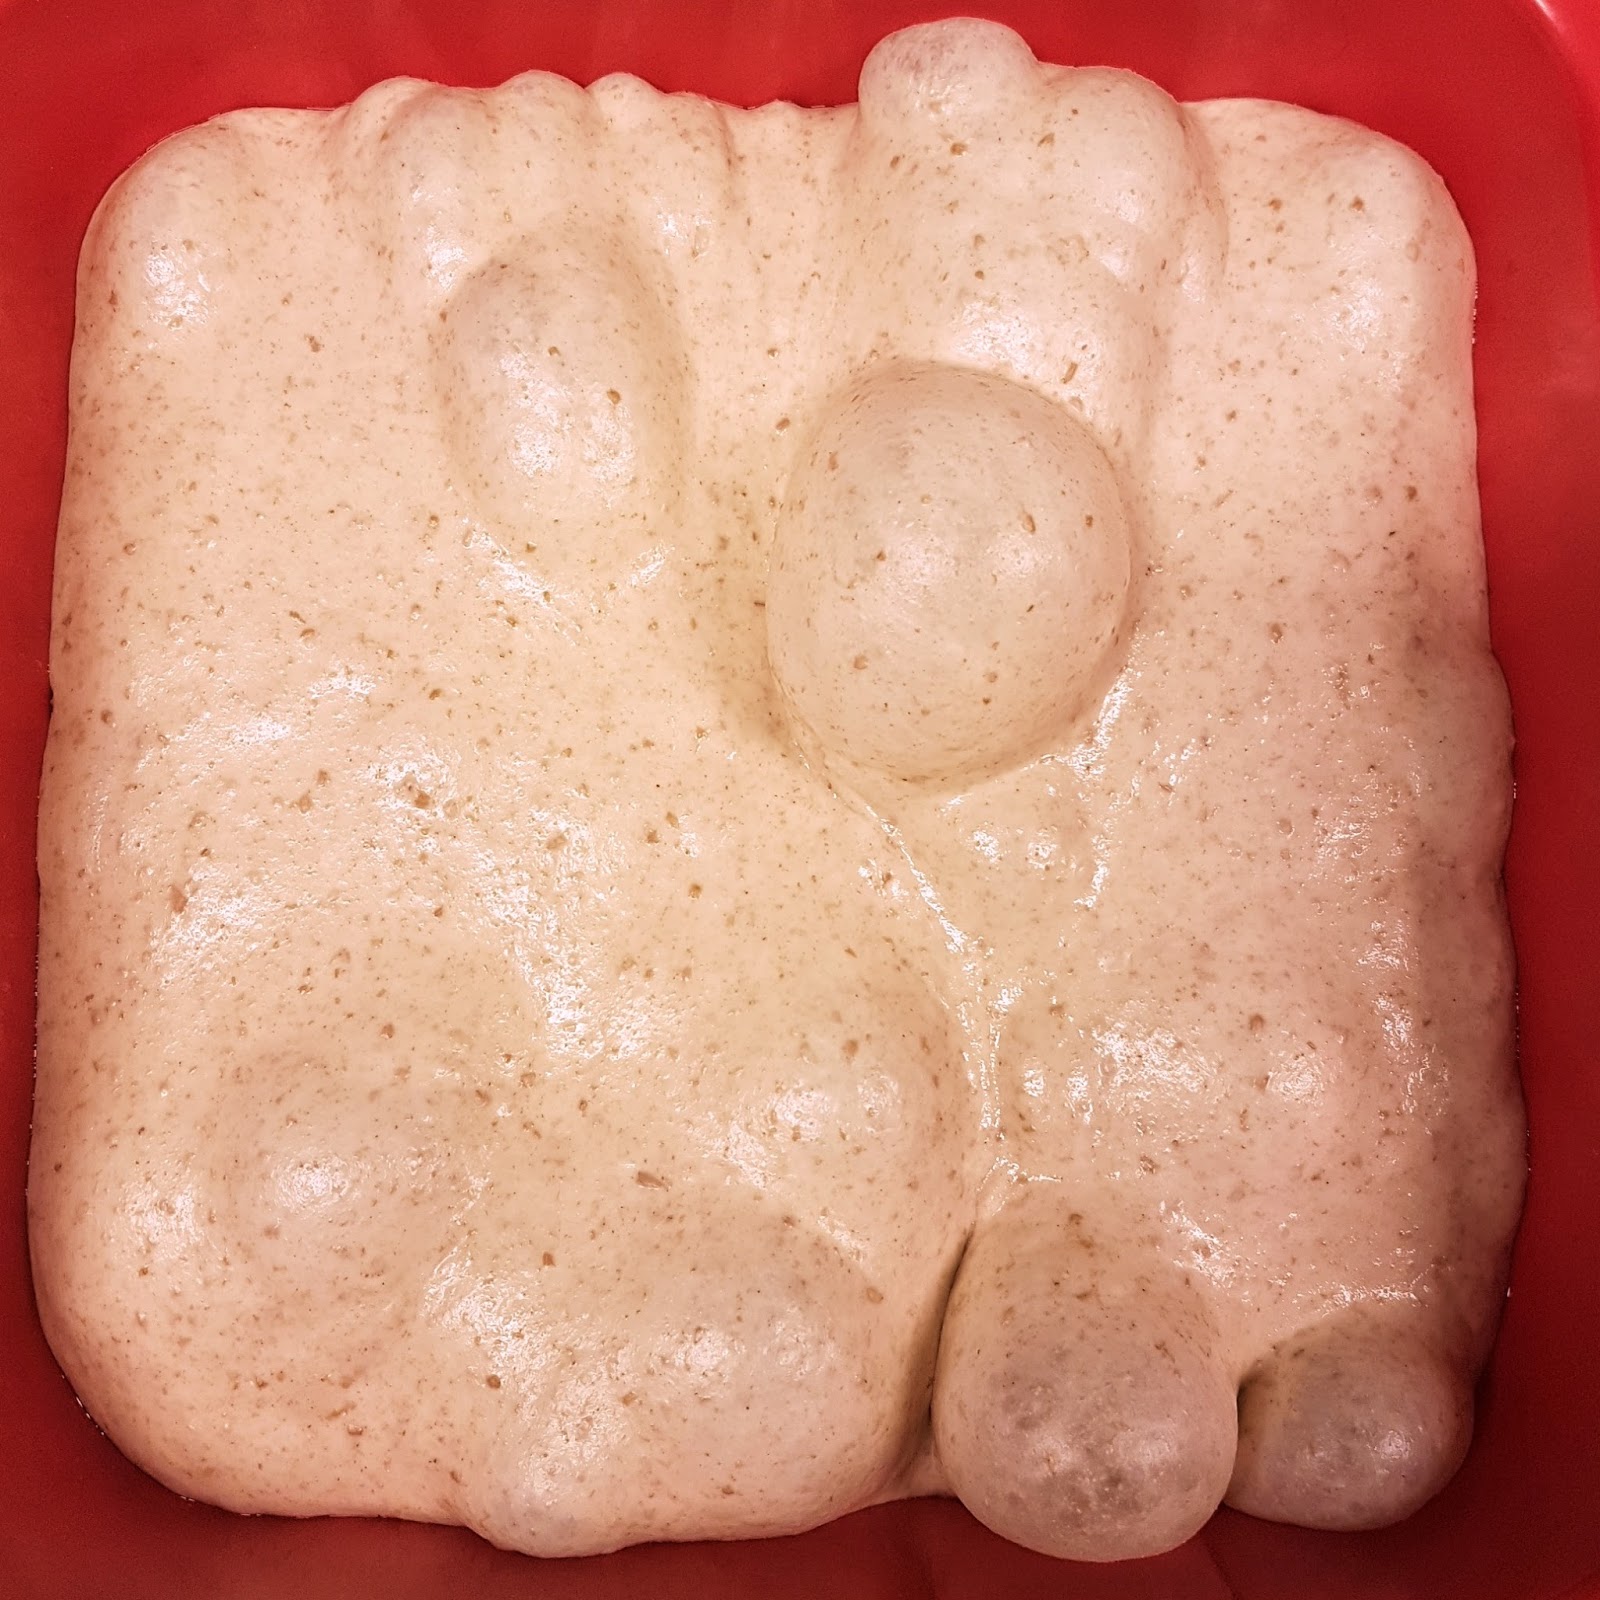
Quando il burro è stato incorporato, rovesciare su un piano unto con burro e dare due o tre pieghe. Mettere l' impasto in un mastello che lo possa contenere per il suo volume più il doppio (2+1). Porre a fermentare 12h a 28c o fino a triplicare.


                                                                               ***

Put in the machine with the order:
Water, sugar, yolks, pasta madre, flour. Turn on for 3 minutes in vel2 with the shovel on. Control that all the flour have been incorporated, then augment speed every minutes until vel5. Leave it work 15 minutes more or less or until the dough starts to hang. Go back to vel2 and put in all the butter. When the butter is incorporated, turn the dough on the working plan (greased with butter) and do 3 to 4 s&f.
Put the dough in a container that can keep it 3 times its mass. (2+1). Leave to ferment 12h at 28°c or until triple in size.


I giorno (burro aromatico) - aromatic butter

Ammorbidire 150 gr di burro e mischiare con 30 gr di miele, scorza grattugiata di 1 arancia e di mezzo limone

Melt 150 gr of butter and mix with 30 gr of honey, 1 orange zest, half lemon zest


II giorno (impasto finale)

I impasto (tenuto per 30 minuti in frigorifero) - I dough kept 30 mins in the fridge
+
150 gr farina (flour)
150 gr tuorlo (yolks)
150 gr zucchero (sugar)
Tutto il burro aromatico (all the aromatic butter)
8 gr di sale (salt)

350 gr uvetta lavata (raisins washed)
300 gr di canditi a piacere (candies fruits)


Mettere nell' ordine in macchina:
Il primo impasto, la farina, il sale. lavorare qualche minuto a velocità 2, poi azionare la velocità 4 e mettere a filo le uova sbattute con lo zucchero. A maglia glutinica quasi formata (15 minuti circa) mettere il burro aromatico e, una volta incorporato, proseguire fino a che l ' impasto si stacca dalla ciotola.
Rovesciare su un piano unto con burro, porre al centro la frutta miscelata e dare un giro di pieghe.
Porre in mastello oliato a riposare per 30 minuti a 28c.
Dare un' altro giro di pieghe e lasciar fermentare fino al raddoppio.
Stagliare, pirlare delicatamente e riporre negli stampi.
Lievitare a 26c fino al raggiungimento dei 4/5 dello stampo. Praticare la Scarpatura ed infornare a 170°c per 50/55 minuti.
Per raffredare, infilzare due ferri alla base e capovolgere i panettoni.
Lasciar riposare almeno 24 ore prima di assaporare :)


                                                                              ***


Put in the machine with the order:
The first dough, flour, salt. Work few minutes at vel2, then augment to vel4 and put little by little the yolks whipped with the sugar. When the gluten is almost ready (15 minutes more or less), put in the aromatic butter, and once incorporated, finish the mix until the dough hangs on.
Turn into the working plan (greased with butter), put in the center the fruits and do a turn.
Put into an oiled container, and rest 30 minutes at 28°c.
Give another set of turns and let it double.
Cut the dough and form it gently and put into the molds.
Proof at 26°C until it reaches the 4/5 of the mold. Practice the cuts and bake at 170°c for 50/55 minutes.
To cool it, pass with the irons the base and turn it upside down.
Let it rest at least 24 hours before tasting :)


Pirlatura della pasta madre
Secondo impasto
Scarpatura 
L' interno 


Grazie a tutti per seguirmi, spero che la ricetta vi piaccia e colgo l' occasione per farvi tanti auguri di buone feste e anno nuovo ! Che porti tanti giorni di lievitazioni naturali :)

                                                                               ***

Thank you very much for following me, I hope you will like the recipe and I take the chance to say:
Merry christmas and happy new year ! Hoping it will bring many days of natural fermentations  :)


domenica 4 dicembre 2016

Bisciola della Valtellina - La ricetta (The recipe)

Bisciola della Valtellina

Buona domenica a tutti !

Dopo gli ultimi eventi che mi hanno visto impegnato nell' organizzare corsi e workshop di panificazione, sono riuscito a rimettermi a scrivere...

Approfitto, con questo post, per inaugurare il nuovo formato del blog. Dopo tante richieste, ho deciso finalmente, di scrivere gli articoli in due lingue, (italiano e inglese), dando la possibilità a tutti di poter capire meglio i contenuti.

E quale il miglior modo di iniziare col nuovo formato, se non scrivendo la ricetta originale di uno dei lievitati dolci più iconici delle mie zone?  L' anti-panettone, un dolce antico, quasi sacro, che veniva consumato con un rituale ben preciso a natale, ma che doveva anche essere, durante tutto l' inverno, fonte di energia per i manovali.

Anticamente, la Bisciola, veniva impastata una o due volte l' anno, data la complessità della lavorazione, a mano ed in grandi quantità, dalle vecchie signore, che custodivano gelosamente la ricetta. Ogni famiglia aveva le sue varianti, con più o meno burro, con farina di saraceno o (la maggior parte) di segale, con nocciole o altra frutta secca.

Questa ricetta che ho creato, partendo dalle mie ricerche e provando tutte le migliori "Bisciole" artigianali, è relativamente semplice e quindi adatta a tutti. (La mia ricetta per uso professionale tuttavia è ancora diversa).


...


Happy Sunday !

After the last tasks, which saw me involved in the organization of bread workshops and classes, I finally got the time to write again...
With this post, I want to share the recipe of the most iconic local leavened sweet, the anti-panettone, an ancient sweet, almost sacred, that were consumed with a precise ritual during christmas, but also that it had been an energy source during all the winter, for the workers.

In the old times, Bisciola, was kneaded by hands, one or two times per year, due to it's complexity, from the old ladies who kept secret the recipe. Every family had some variations, with more or less butter, with buckwheat flour or (the most) with rye flour, some used nuts or other dried fruits...

This recipe, which I developed from my researches, and trying all the best artisanal "Bisciola", is relatively simple, and so it is good for everyone, (hovewer, my professional recipe is different).


La pesa degli ingredienti - Scaling the ingredients


La Bisciola della Valtellina:

Ingredienti:

400 gr di farina 0 forte
100 gr di farina di segale integrale
150 gr acqua
100 gr di burro nostrano
100 gr di zucchero di canna fine
25 gr di miele
160 gr di uova intere
100 gr di pasta madre
4 gr di sale fine integrale
scorza d' arancia e limone

100 gr di uvetta
200 gr di noci di montagna
200 gr di fichi secchi chiari


Il procedimento:

Impastare tutti gli ingredienti tranne il burro e la frutta secca.
Ad impasto incordato, aggiungere il burro precedentemente portato a consistenza "pomata".
Una volta che il burro è stato assorbito del tutto, aggiungere delicatamente la frutta secca facendo attenzione a non impastare troppo per non rovinare la maglia glutinica.
rovesciare l' impasto in un mastello imburrato e mettere a lievitare, fino al raddoppio, a 28°c coperto con telo.
Spezzare del peso desiderato (125, 250, 350, 500 gr ecc) ed effettuare la pirlatura.
Disporre in teglie e mettere a lievitare fino quasi al raddoppio. praticare delle incisioni paralelle (2 o 3) per tutta la liunghezza delle palline. infornare  a 170°c in base alla pezzatura: circa 35 minuti 250gr, 45 minuti 500gr ecc...


...


La Bisciola della Valtellina:

Ingredients:

400 gr strong white
100 gr di whole rye
100 gr di artisanal butter
150 gr water
100 gr di brown sugar
25 gr di honey
160 gr di eggs
100 gr di pasta madre
4 gr di fine salt
orange and lemon zests

100 gr di raisins
200 gr di mountain walnuts
200 gr di dried white figs


The process:

Knead all the ingredients but the butter and the dried fruits.
When the dough is formed, add the butter previously heated to reach the cream consistency.
After that all the butter have been absorbed, add the dried fruits carefully, to not break the gluten too much.
Put the dough in a container and put it at 28°C to rise, until it doubles, covered.
cut the dough into desired pieces (125, 250, 350, 500 gr ecc) and shape it with pirlatura.
Put the rounds in a tray and proof them until they doubles. Make 2 or 3 parallel cuts throught all the lenght, cook it at 170°c depending on the weight: 35 mins for 250 gr, 45 mins 500 gr ecc...


Bisciola, impasto - Bisciola, dough


bisciola lievito madre
Il prodotto finale - The final product

lunedì 14 novembre 2016

Different dough folding methods: why and when apply

A proper fermented soft dough, folds allowed develope the strenght to retain gases


Hello everyone ! Have been a while since I wrote the last article on the blog.
I have been very busy preparing and organizing a class, and a two days international workshop with a very special guest baker from Spain, the master and high hydration specialist, Juan Luiz Estevez !
To learn more please check my Instagram or Facebook accounts.

But now it’ s time to accomplish my duty, and as I promised, write more in-depht guide on dough folding.

First of all, what does it means folding a dough ? Basically it’ s a tech applied during the bulk fermentation phase, which consists of fold the dough over itself stretching and releasing it gently.


Why we do that ? Because stretching the relaxed gluten allows the strands to organize in a better way and, for this reason, the gluten web get stronger and less extensible.
Also, proper folding makes fermentation better:

new oxygen being introduced in the dough;
microorganisms get distributed in a more even way;
dough temperature gets more uniform.


So now it’ s time to take a deeper view on the practical side, and check the main different folding methods.
I suggest to use for every method a different container for the dough. All of those containers must be previously oiled up.
Is possible also to do the folds free, on a bench but this involves the use of flour.
Because we don’t want to introduce new flour in the dough, I prefer to use containers and also to rinse the hands with water, this will prevent dough to stick.

The most simple, and most used, folding method is the 4 ways fold a.k.a. letter fold.
It should be performed in a square container and basically consists of fold each opposite side of the dough over it’ s own center and then flip it with the seam side down.
This method is suitable for soft and extensible doughs without too much hydration.
Should be performed in the first hour or two of the bulk fermentation, with regular intervals (45 minutes 1h etc..)


Another important method is the “ciabatta” fold, as I like to call it.
Basically enrolling on itself the dough, up to bottom, with a semi-circular motion, for 3 or 4 times.
This really works good for wet and extensible doughs; it gives a lot of strenght and doesn’ t stress the guten too much.
As the previous method, should be performed in the first two hours of bulk phase.


Last but not least, the “clock” folding method. Is the one I prefer for less extensible doughs, as I feel it performs better. The gentle strech prevents the gluten strands to tear down and brake the structure.
This is better done in a round container and it’ s performed taking small portions of the rounded dough and fold them to the center while turning the container clockwise with the other hand.
Previous rules on timing apply here too.


Hope you will have fun trying those techniques ! Please let me know how it goes or if anything is not clear enough :)


lunedì 24 ottobre 2016

Dough Folding


Hello everyone!
This article that will talk about a well known method every sourdough baker practice: Folding the dough.
Also known as s&f (stretch and fold) I prefer to call this important step just dough folding.

Now, let' s see why this passage is important in baking and even more in sourdough baking.

When we mix a dough, we always want to look for its final temperature, as well as its strenght and level of gluten development (where strenght is the relation between elasticity and extensibility, not absolute strenght).
We all know that those are important parameters to control (have a look to previous articles if you missed something).

Well, folding the dough affects those parameters quite a lot. Let' s see why:

Temperature:


When a dough is mixed, it's then stored in a food grade container, (usually plastic), which have a volume 3 to 4 times bigger than the dough itself. This is called bulk phase.
As the word says, the dough is here stored in big quantity to be able to develope the wanted charactheristics of flavour, strenght and volume.
Because most of the time we store the dough at a different Temperature from the room, doing folds during the bulk stage allows to create a uniform grade of T in the dough.
In a very close relationship with this, folding helps also to distribute gases and bacterias, scattering them through the dough.
This is also very helpfull to the fermentation.


Strenght:


Really important dough feature, it will estabilish how to process the dough in the shaping and proofing phase.
Meanwhile with commercial yeast, is hard to have to augment a dough strenght because the amount of gases produced by yeast during the proofing phase garantee a dough strenghtening; In sourdough baking is much more useful (and even more with high hydration doughs) because less gases are produced during fermentation stage.
Applying a number of fold/s during the bulk stage, at regular intervals, will give strenght to a dough.
Those foldings should be gentler as they are performed towards the end of this phase, to avoid gases loss (that will generate a loss of volume and flavours).
I will give a few but great tips for folding in the "secret" section next on!


Gluten development:


Very related to dough strenght (but not the only cause, gluten development is also a key element. It will state the dough capacity to retain gases and so, to augment volume during the proofing and cooking phase.
While folding our dough, gluten strands are gently stretched, and they create a more regular net to trap the gases.
The more foldings we do, the more regular and tight will be the gluten net, and therefore the crumb structure.